HOWTO: Setting up a local NuGet repository for Rebex library packages
Starting with 2017 R3, the 'full' (purchased) version of Rebex library installer includes NuGet packages. To use the NuGet packages, either add them to your private NuGet repository, or set up a simple file-based local repository, as described bellow.
If you have not purchased a Rebex license yet, use the NuGet.org edition of Rebex libraries instead for your 30-day trial.
Setting up a local file-based NuGet repository
- Log into your Rebex account, download the installer and install the libraries.
- Create a new folder on your computer, for example "C:\temp\LocalNugetRepository".
- Copy the installed NuGet packages (.nupkg files) to your local repository folder. The default installation folder is "C:\Program Files (x86)\Rebex Components 2017 R3\bin\nuget" (depends on the release).
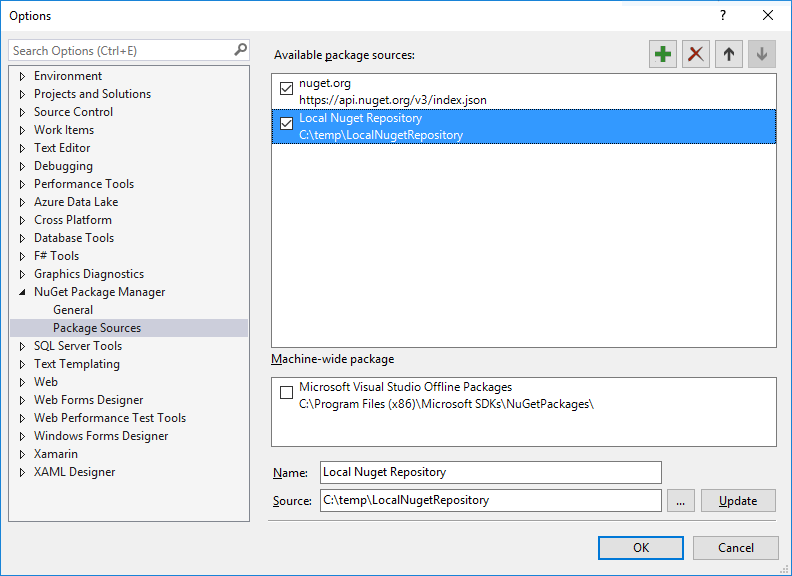
- Start Visual Studio and add a new local repository folder via "Tools > NuGet Package Manager > Package Manager Settings". Click the Package Sources tab within the settings dialog, followed by the 'plus' icon in the top right corner to add your new package source: